Nikon Metrology Aerospace Metrology Systems

The Nikon Metrology portfolio spans the entire spectrum from small component inspection with submicron accuracy, over turbine blade inspection up to complete solutions for metrology assisted component machining and aircraft assembly.
Metrology assisted production
Nikon Metrology assists customers in successfully deploying metrology-driven manufacturing capability. Metrology assisted production builds on accurate geometric data to consistently increase the precision and speed of design, manufacturing and assembly operations. Producing parts first time right eliminates expensive rework and avoids costly scrap.
Shimming of aerospace parts and milling of aluminum parts
Using the Laser Radar system or laser scanners, aircraft OEM are able to produce shimming parts based on the actual shape of the mating surfaces. In case of large machined aluminum components, Laser Radar can inspect the components on the machine so that they can be brought within tolerance levels without having to transport the component to a dedicated inspection room.
Cured laminate compensation process for composite parts
Together with our partner Magestic Systems Inc., we offer a streamlined process for right-first-time composite production. In the joint process, the Laser Radar system automatically captures the surface geometry of composite parts of any shape and size. Based on where the part is structurally deficient and by how much, Magestic Systems automatically nests and cuts cured laminate plies. After placing these plies at laser-indicated part surface locations, the geometry of the part is verified. Immediate savings include the minimization of waste and the maximization of accuracy, part quality and process efficiency.
Automated high-accuracy drilling, riveting and milling of aerospace parts
Adaptive robot-control provides full 6D closed-loop feedback for industrial robots. Whether the robot is used for machining, inspection, applying beads or manipulating objects, roboting tasks are executed with 0.1mm absolute accuracy.
Large-volume aircraft inspection and metrology
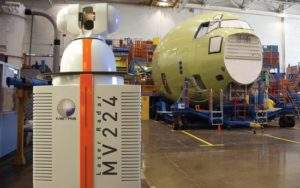
Nikon Metrology’s Laser Radar is the only solution available that provides automated, non-contact measurement capability for large-volume applications of up to 60m radius. The new generation of metrology instruments precisely measures large-scale geometry without requiring photogrammetry dots, spherically mounted laser tracker retro-reflectors or probes.
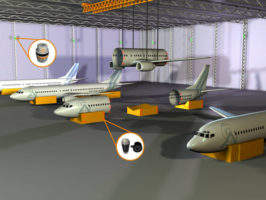
iGPS is a modular, large-volume tracking system enabling factory-wide localisation of multiple objects with metrology accuracy, and is applicable in manufacturing and assembly.
High-accuracy component inspection and reverse engineering
As part of its portfolio Nikon Metrology supplies CMM solutions for high-precision and large-component inspection within the aerospace industry.
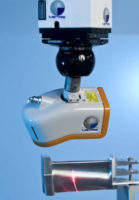
These CMM can be equipped with state-of-the art digital laser scanners that create high-accuracy, high-density 3D digital copies of the part with a minimum of effort. These copies can be used to create CAD surface models from components that have been tuned manually or where no CAD file is available.
Alternatively, these point clouds can be used for the instant inspection of critical part features such as the sections of turbine blades or complete surface geometry for in-depth off-line analysis.
Computed tomography (CT) inspection of composite parts and turbine blades
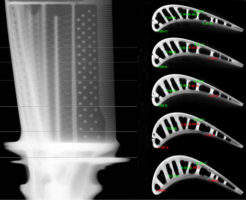
We can analyze the structure of composite materials and inspect the internal structure of large composite parts using CT. Computer Tomography provides insights into the inside of complex parts and is a key enabler of numerous applications: non-destructive fault detection and failure analysis, assembly inspection of complex mechanisms and dimensional measurement of internal components.
The Nikon Metrology XT H 450 LC is the new reference for turbine blade measurement and NDT of small to medium castings. At the core of this powerful equipment is a 450kV micro-focus source, providing superior resolution and accuracy.
Our range of X-ray and CT inspection equipment and services can be used for turbine blade inspection, positioning of cores in wax for turbine blades, crack analysis in components, and to measure wall thickness of cooling holes inside jet-engine turbine blades.
Products and Services
Video
White Papers
Related Projects
Press Release
Regional Offices
Geldenaaksebaan 329
Leuven 3001
Other
Belgium
12701 Grand River Avenue
Brighton, MI 48116
Other
United States of America


